Table of Contents
Student Manual
Open eClass (ver.3.1)
1. Introduction
The Open eClass platform is a complete Course Management System. It is the solution offered by the Greek Academic Network GUnet to support asynchronous eLearning services. It is actively supported by GUnet and is distributed for free as open-source software.
The introduction of elearning into the traditional teaching process provides new capabilities and allows new means of interaction between students and teachers. At the same time, it supports the electronic management, storage and presentation of teaching materials, transcending limitations of space and time and creating the necessary conditions for a dynamic learning environment. The platform is accessible via a simple web browser without demanding any specialized technical knowledge.
This manual is a useful guide for the registered platform student users, in which one can find analytical presentations of platform operations. More specifically, what is described is the student participation in the platform (student registration, user profile, eCourse participation, access to educational material, electronic assignment submission, eCourse agenda and informational announcements, following a learning path, working in groups, discussion forums, self-evaluation tests, eCourse wikis, etc).
2. Platform Registration
On entering the Open eClass platform with a Student Account, you will immediately be allowed to explore a new dynamic learning environment. What is more, you will be able to gain access to all available eCourses (open eCourses, demanding registration eCourses, as well as “closed courses” that you have been invited/registered to by the eCourse teacher).
2.1 Student Account
In order to create a new student account you have to follow the next steps:
- Select: “User Registration” from the platforms main page. This selection leads automatically to a) “Application for Creating a Student Account” or b) “Student Account Creation”
- Then click on: “new student account”
Note that the appearance of the student account application form or the student account creation form depends on the administrator’s policy.
2.1.1 Application for Student Account
In case the system administrator has established a policy not allowing automatic student registration to the platform, then you have to fill the student account application form with your personal details. More analytically, you will need to fill in:
- Your personal information: Name, Surname, Phone number and e-mail address.
- The username you wish to have, which is the one you will be identified with by the system. Note: you are advised to use Latin characters for the username and no special characters; only numbers or/and letters.
- Comments, where you can write the reasons for registering to the platform as a student.
- Select the School or Faculty you belong to from the list and click on the “Send” button.
The platform administrator will receive your application and after processing it you will receive a registering comfirmation email message, which will refer to your log in username and password. In case your personal information does not accurately provide your identity or state the reason why you applied, the administrator will contact you by email or phone call to get more information so as to create your account.
2.1.2 Student Registration (Automatically Account Creation)
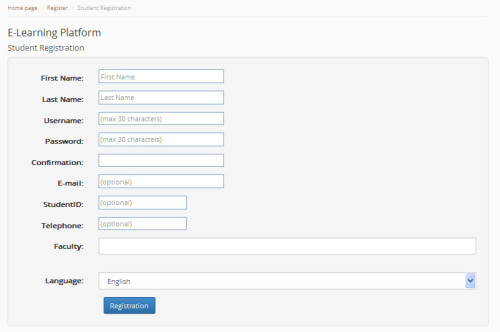
If the system administrator has set a policy that allows automatic student registration to the platform, filling in the registration form will automatically create your student account. More analytically, you will have to fill in:
- Your personal information: Name, Surname, Phone number and email address, as well as your Student Identity Number.
- The username and password you want to have. They will be used by the system so as to identify you. Your password has to be typed twice for confirmation. Note: it is suggested that the username and password should be written in Latin characters and not include special characters; only numbers and/or letters.
- Select the Scholl or Faculty you belong to from the list.
- Finally, click on the Registration button.
Please note that:
Initially, the system will send you the email address registered on the registration form. When you receive the email message, you must confirm your email address by following the link you will find in the message body.
The system will check your personal information and automatically create your personal student account. Then, the platform will handle your request and will send you a confirmation message (email) of your registration, stating your username (username) and password (password) to access your system.
2.2 Alternative Student Accounts
If the installation of the Open eClass platform you use supports users’ authentication through LDAP, IMAP, POP3, External MySQL, CAS or Shibboleth then the “Student Registration” link leads to a choice of alternative registration means.
2.2.1 Student Registration through LDAP account
If you have an account in your Institute LDAP Directory Service then click on “New Account (using an LDAP account)”. More analytically:
- Fill in the email and password you have in the LDAP Service. In that way, you will have access to the Open eClass platform using your email address and the already existing password.
- Select the LDAP Server of your Institute,
- Choose the School or Faculty you belong to from the list
- Click on the “Registration” button
If the information you have inserted is correct, the platform will ask you to confirm the specific action. Click on the “Add” button
In any case, you will receive an email message confirming your registration and clearly stating that user authentication through LDAP Service has been exploited for access to the Open eClass platform.
2.2.2 Student Registration through IMAP, POP3 Authentication
If you have a POP3 or IMAP email account, you can register through that account. Fill in the application form with the username and password you use in the database and then click on the “Registration” button.
2.2.3 Student Registration through External Database (MySQL)
If you have an account in an external MySQL database, you can register to the platform through that account, too. Fill in the application form with the username and password you use in the database and then click on the “Registration” button.
2.2.4 Student registration through Central Authentication Service (CAS or Shibboleth)
If you have an account in a central authentication service for accessing various resources or services and platform administrator has configured Open eClass for authentication through it, then you can use it. Just click in “Authentication via CAS” (or “Authentication via Shibboleth”) and you will be redirected in the login form of Central Authenticated Service. If your login is successful then you will be redirected back to the Open eClass platform logged in.
2.3 User Login
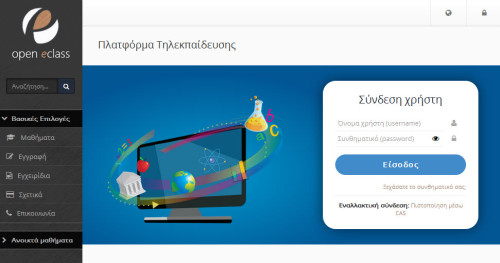
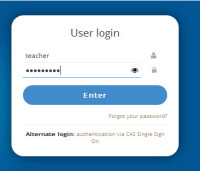
After you have registered an account with Student rights on the platform, you will have to type your username and password in the login form every time you want to enter.
By doing that you will have a student user access in all available eCourses modules, that are analytically presented below. If you forget your password, you have to click on the “Forgot your password?” link and follow the instructions. Please notice that the instructions will be sent to your email address.
3. User Portfolio
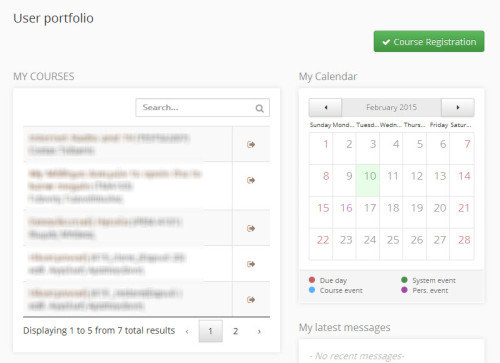
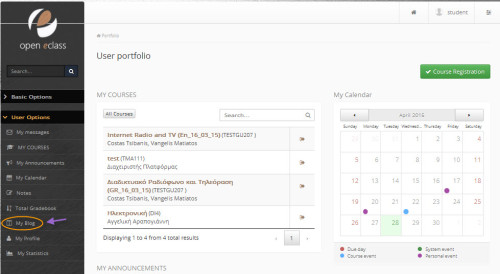
By logging in the platform (inserting your username and password), you will enter into your personal portfolio, an area that allows you to organize and control your eCourses participation in the platform.
On the left menu, you are provided a series of choices concerning eCourse registration, editing you personal profile, your personal eCourse calendar, personal statistics etc, which will be presented below.
On the right column there is a list of attended eCourses. In the courses you attend as a student, there is an “unregister” choice in the course, so that you can delete it from the list. If you click on the title of the course you enter it with the rights of a student-user. Finally, in the analytic student portfolio view you are provided with information concerning your eCourses, your assignments deadlines, your latest documents, your eCourses latest announcements and the latest submission in your eCourses discussion forums.
3.1 Sliding menu
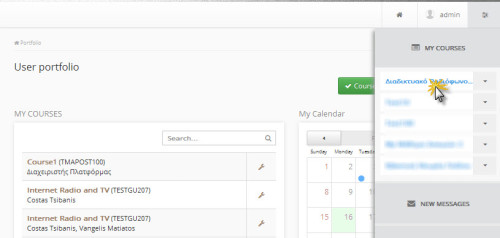
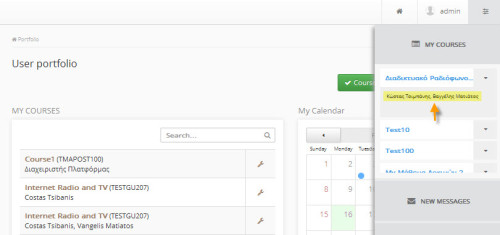
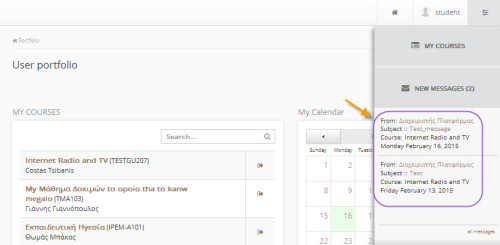
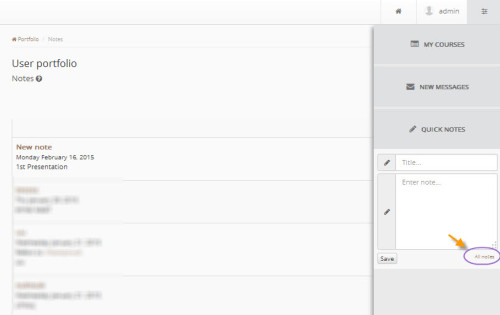
One of the elements that were added to the new version of the platform is the drop down menu (sliding menu) located at the top right edge of the home screen. This menu consists of three sub-menu which are:
- My Courses
- New Messages
- Quick Nodes
My Courses
Selecting this sub-menu you can view the courses in which you are registered and quickly access them just by pushing on them. Also in this menu except the title of the course are presented and the names of those responsible of the course.
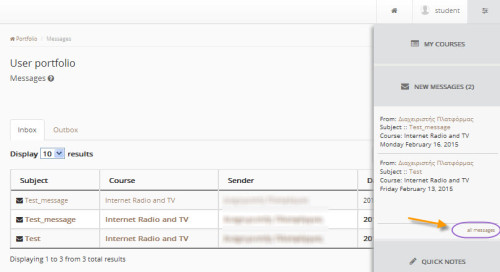
New messages
You can easily view your incoming messages by simply selecting this sub-menu.
For your added given the opportunity to view all your messages incoming / outgoing button named “all messages”
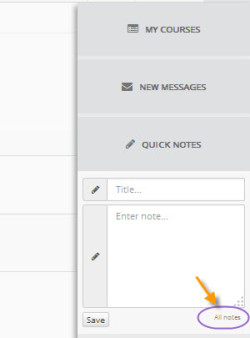
Quick Nodes
With this option you can quickly and easily write a new note. Simply enter the title and description of your note and click save.
You are also able to display all the notes given by clicking on all the Notes connector
The results of the above options are presented in the figure below
3.2 Modify your profile
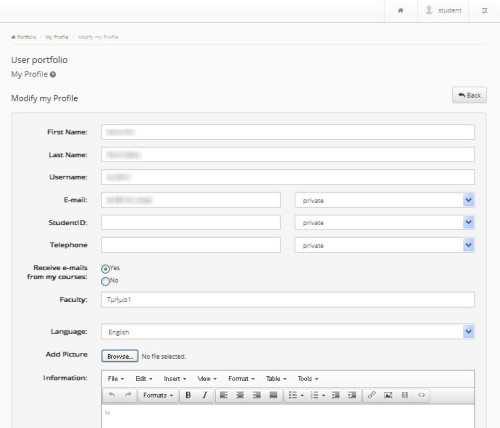
Choose “modify your Profile” from the left column of the user portfolio, and change your personal information, like name. surname, email address, default language and view (simple, analytic), or you can insert your personal photo to be displayed at each participating in forums, to user groups, etc. Type the new information in the corresponding fields and click on “Modify”.
Especially for the fields email, registration number and phone you can choose to not appear in your public profile, as they are sensitive personal data. You can also change the look of your portfolio by selecting detailed or summary, which we presented in the previous section. When finished making changes click the button labeled “Change”.
The first time the students entered the platform, they are prompted by the system to confirm e-mail address. The platform sends a message (e-mail) to the address stated and asked to follow a link to confirm. Once this is accomplished, the field “Confirmed address email” now appears checked.
Note for LDAP, IMAP, POP3 users: LDAP, IMAP. POP3 users cannot make any changes to their profile. They can change only the portfolio’s default language, their personal photo and portfolio’s view.
3.2.1 Changing email address
It should be noted that the first time someone entered the platform, they are prompted by the system to confirm his/her e-mail address. The platform sends an e-mail message to the address he/she is registered and asked to follow a link to confirm. If for some reason the user change his/her email address, then the platform displays a message that prompts users to advance the process of email address confirmation.
The email confirmation form prompts user for “Send confirmation code”. User will then receive a message to that address, which should follow the link in the body of the message to complete the process (similar procedure as the first entry in the platform).
3.2.2 Changing email address
It should be noted that the first time someone entered the platform, they are prompted by the system to confirm his/her e-mail address. The platform sends an e-mail message to the address he/she is registered and asked to follow a link to confirm. If for some reason the user change his/her email address, then the platform displays a message that prompts users to advance the process of email address confirmation. The email confirmation form prompts user for “Send confirmation code”. User will then receive a message to that address, which should follow the link in the body of the message to complete the process (similar procedure as the first entry in the platform).
3.2.3 Deleting an Account
You can also delete your account from the platform if you choose the “Delete Account” link. However, you first need to unregister from all the eCourses you have been attending and then click on the “Delete Account” link on top of the screen. You will be asked to confirm this before your account has been deleted.
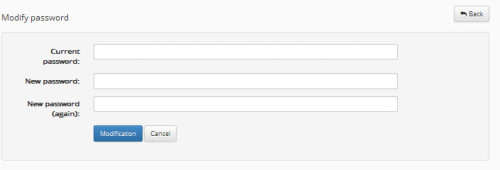
3.2.4 Changing Password
Lastly, you are also given the opportunity to change your password in order to access the platform. You need to type the old and the new password and then click on the “Modify” button.
3.3 Course registration
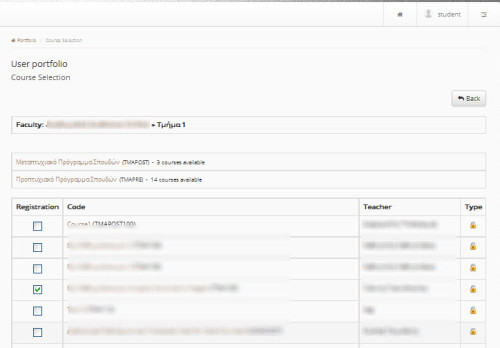
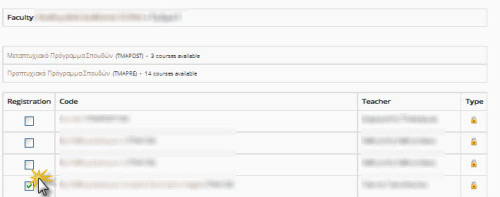
If you click on “Course List” on the left column in your personal portfolio, you will be transferred to the platform’s eCourses list, from which you can select the eCourses you want to register in your personal portfolio. The course list that appears includes the courses available, grouped by the Faculty they belong to.
First, select the Faculty and then choose the courses you wish to attend by marking (?) the checkbox next to their title.
Please note that once you select a course you automatically see the green check mark of confirmation for your registration to the course. This procedure allows you to configure your own list of attended courses.
Click on any course title you want, to enter the eCourse area with student’s rights.
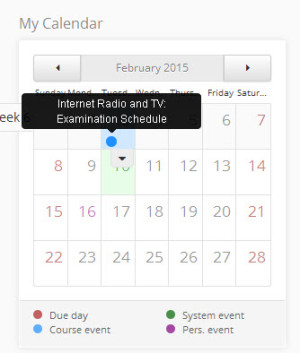
3.4 My Calendar
If you click on “My Calendar” on the left menu of your personal portfolio, you can see a calendar of events that have been included in all the course agendas you have registered for. In that way, you can better organize your (weekly/monthly) programme in the platform.
3.5 Personal portfolio advanced view
If you choose advanced view in your personal portfolio settings you are provided with information concerning your eCourses, your assignments deadlines, your latest documents, your eCourses latest announcements and the latest submission in your eCourses discussion forums. So, you are informed for all the eCourses that you attend without needing to check each eCourse separately for updates.
3.6 Personal blog
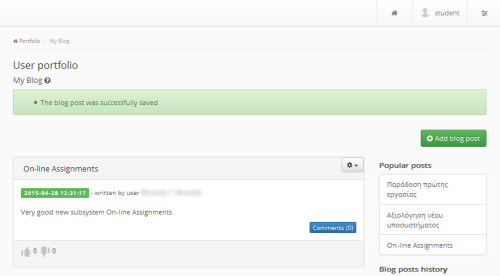
The subsystem “My Blog” allows the creation of a list of entries on various issues relating to the platform courses. Entries can be anything your concerns associated with your classes (Figure 1, Figure 2). Your personal blog is accessible through your profile by clicking on “Personal blog”
3.7 Search
If you click on the “Advanced Search” button at the top, you can search on the platform courses based on the title of the course, any keywords, the course units, the teacher or the course code. It should be noted that only courses in which you are allowed access (“open courses” or “registration open courses”) will be included in the search. What is more, you can do a simple search by typing the text you like and click on “OK”. Note that you can also search from the course homepage. In this case, the search will be done only through the specific eCourse educational material.
3.8 User statistics
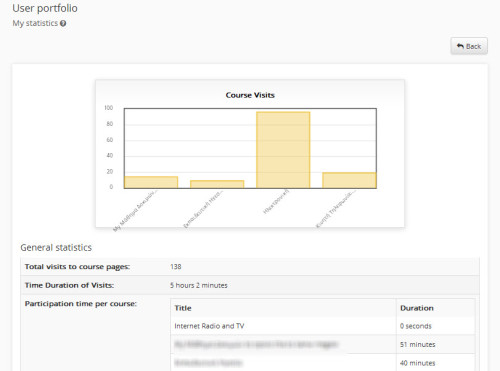
If you click on “User Statistics”, you can access statistic information concerning your account. Specifically, you can see the number of visits in the platform, as well as a diagram concerning your preferences on courses. At the same time it is presented the duration of your participation in the courses. Also, there is a board of the latest platform visits (date and time).
3.9 Exit
Finally, you can sign out of the Open eClass platform, by clicking on “Exit” on the left side, at the top of the screen. In that way, you inform the platform about the end of your session and avoid the inconvenience of someone else using the platform with your account (username or password). This action is especially important for the safety of your eCourses when using public computers.
4. Platform’s eCourses
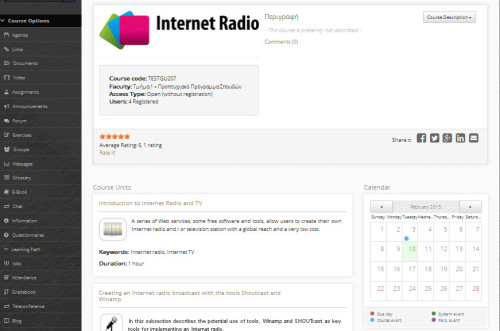
The eCourse is the core part of the Open eClass platform. Each course is an autonomous entity in the platform, which integrates a series of learning tools (modules). The eCourse is, in fact, a modular structure, which is organized and maintained by the teacher in charge. More specifically, the student eCourse home screen has the following view.
On the eCourse home screen, there is a short description, in which basic information (title, code, responsible teacher, department etc) are reposted. Also, there is toolbar with an “insert course URL as a bookmark” tool, a hyperlink to course RSS fed and an “email” hyperlink, which allows registered student-users, who have defined their email address in their profile, to communicate with the course teacher via email. On the left, there is a menu with all the active eLearning tools (modules) provided for the eCourse by the teacher in charge.
4.1 Course Units
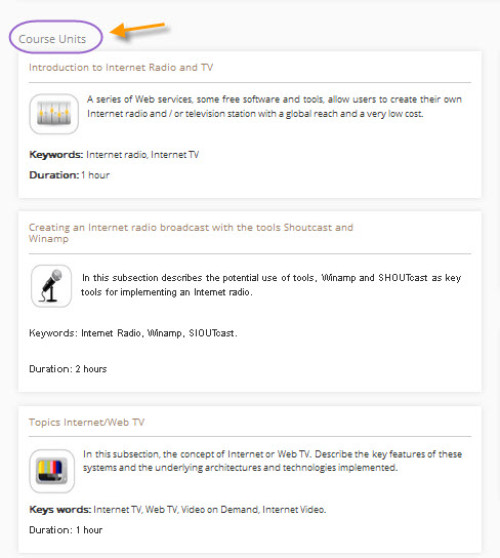
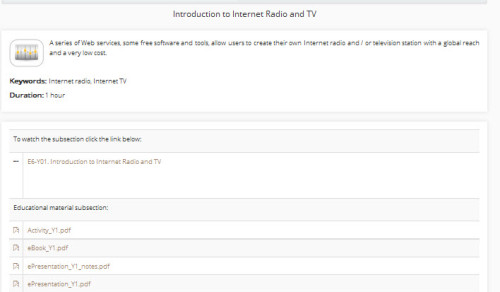
Course units offer a flexible way to organize educational material that is stored in the course learning modules in an articulate structure.
More specifically, teachers can organize their courses structure based on the existing educational material in a way that follows the real life educational process. Course unit contents are accessible through the course homepage by clicking on its title.
The student can click on the name of the module that wishes to enter the contents. The picture bellow shows the contents of the module we chose.
4.2 Course Description
Course description is a module providing useful information about the course syllabus, like course short description, course ID, goals and educational material, evaluation and testing, supportive educational material and activities and any other information the teacher values as being important.
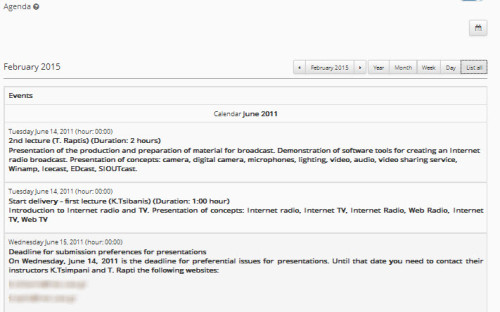
4.3 Agenda
The Agenda module informs you about the most important events of the course in a chronological order (conferences, meetings, evaluations, etc). You have the choice of altering the presentation order of events (recent-older), by clicking on the “Reverse presentation order” that is on top action bar. Furthermore, the events presented in the agenda may include hyperlinks which can be clicked to transfer you to the associated content.
4.4 Documents
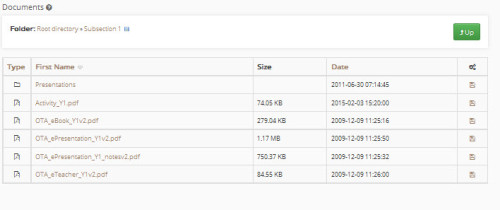
The module “Documents” is the area where the educational material of the course is stored, organized and presented. More specifically, this module provides a useful file organization and grouping mechanism for educational material (texts, presentations, pictures, diagrams, etc) through a folder, sub-folder system. This tool works as a common file manager tool, allowing the responsible teacher to organize all the available course documents in folders.
In order to open a course document file click on the file title and then click on “Open”. If you want to download and save a course document file to your local pc click on the file title and then click on “Save”, and type the folder you want to store it in. Transfer will start immediately. An explanatory text (comment) may follow below the file name, so that you can determine its content without opening it before.
4.5 Announcements
The Announcements module allows registered users’ enlightenment on specific course issues. At the same time, it allows course teachers to send announcements to registered students, who have defined their email address in their profile, via email. (“Modify your Profile” in user’s portfolio).
4.6 Forum
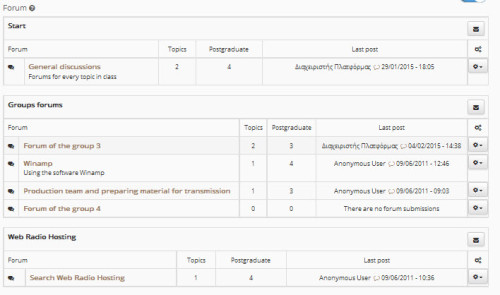
The eCourse discussion forum is a teacher - student interaction module. The platform offers the opportunity to create forums, allowing participation to all registered in the course users (students and teachers).
Furthermore, you can see the last insert in every forum subject, the number of forum subjects and the number of messages. Clicking on a topic you can participate in the units it includes. More specifically, you can watch all topics discussed, the topic sender, the date the message was posted, the answers sent for the specific topic, and the number of times it has been read, as well as the date and time when the last answer was sent.
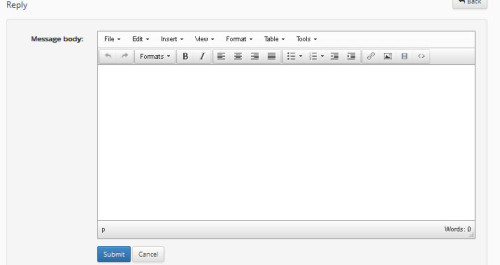
If you want to read messages in a topic, click on the topic title and you will see its contents. Messages are read downwards and at this stage you have some choices to make. In order to send an answer click on the “Answer” link and type your message in the textbox and then click “Submit” to send your message or click on “Cancel” if you do not want to send it.
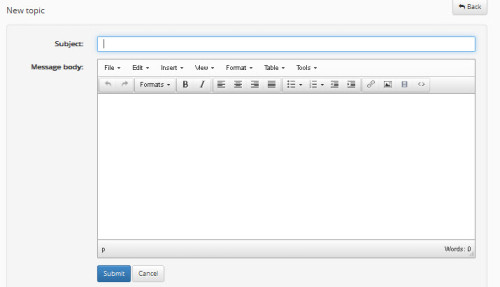
If you want to start a new conversation, click on “New Topic”. Type the topic of the conversation and the message in the corresponding textboxes. In case of a mistake you will view an error message. Sometimes, it is necessary to use the “Go Back” button of the browser so as to make the error message disappear.
If the course teacher has added you in a group (see Groups), it is possible that there will be a folder with group discussion forums. These forums are usually closed to group members depending on the teacher’s decision. “My group” will appear next to your group forum. If groups are closed, you can click on the groups you belong to only.
4.7 Links
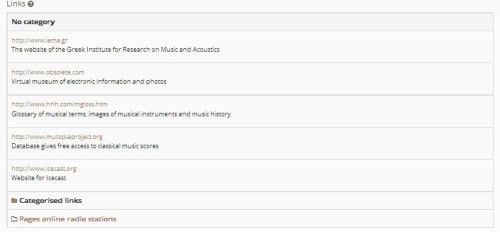
The Links module gives you the opportunity to add useful Internet resources and categorize them at the same time. They have been organized by the course teacher and each one of them has a title and a description with further information.
The links chosen by the teacher may be grouped. You can choose “Show” if you want the links of a group to appear on screen and “Hide” if you do not want them to appear.
4.8 Course Assignments
The Course Assignments module is a very useful tool since it allows the electronic admission, submission and evaluation of course assignments. More specifically, it allows registered student users to upload electronically their assignments in the platform until the submission date and then see their grade, after the teacher has graded them.
If you click on “Course Assignments”, you can see the assignments placed on the platform by the course teacher, the deadline for submission, and the grades, if the assignments are evaluated by the teacher.
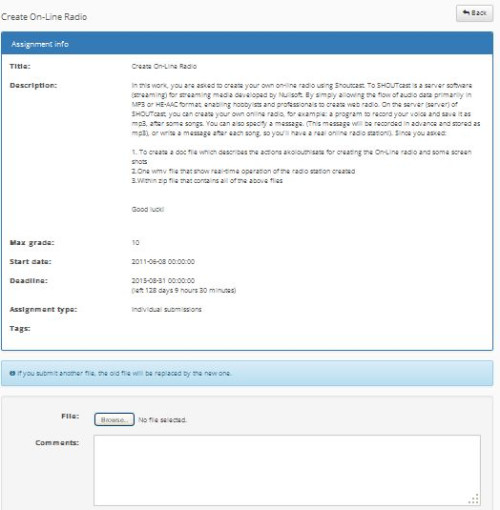
If you click on the assignment title, you will be able to see more information about the assignment, like the title and description of the assignment, the starting date and the assignment submission deadline, the type of assignment, individual or group one. You can upload your assignment from your pc to the platform.
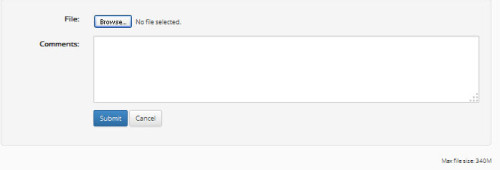
- Click on “Browse”, navigate yourselves in your local driver and select the file you want to upload
- You can type a description of your assignment as well
- Click on the “Send Assignment” link
The uploading process starts and you will soon be able to see your assignment document in the assignment submitted list. Notice that you cannot delete documents you have already uploaded, but you can upload revised versions of your assignments, so as to replace the previous ones, until the deadline, you are otherwise denied the opportunity to submit your assignment.
4.9 User Groups
Another course module that allows cooperation and interaction among the students is the User groups.
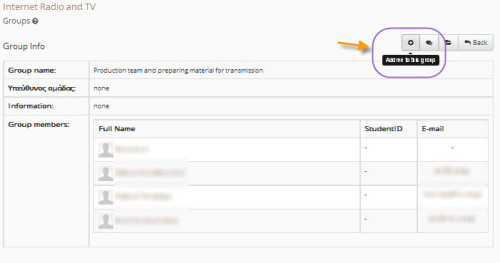
A group of users is a group of course registered students who share the same forum and the same file and assignment uploading area. If the course teacher has set a number of user groups, you can click on their group’s name to see:
- The groups of users organized by the teacher
- The number of registered users in each group
- The maximum number of users possible to be registered in that team
- If you belong to a group, there is a “my group” sign next to the group title
If there is a “Registration” option next to the group names, these groups are not full and you can register. If you have registered to a group which is not full of members, in order to participate:
- Click on the “Registration” option next to the group name you want to participate in
- Then, click on “Add me to the Group”
Since you are a member of a group, you are provided a common document area so as to share files with other members of the group, as well as a group forum. The group forum offers you the opportunity to communicate with all the group members. The document area allows you to upload, rename, delete and remove files, create folders and sub-folders so as to organise your documents in a better way.
4.9.1 Group Assignment
If you want to submit a group assignment you have to upload your group’s assignment file to the common group document area and the click on “Publish” and fill in all the form fields very carefully. Any member of the group can submit a group assignment file. Alternatively any member of the group can upload a group assignment through a submission form in the Course Assignments module.
4.10 Exercises
This module provides self-evaluation exercises for students, which have been created by the course teacher. Its basic aim is students’ training on course material. Some exercises may have a time limit or maximum number of attempts (teacher’s choice).
More specifically, if you want to take a self-evaluation exercise, choose the one you want by clicking on its name. Questions appear automatically (multiple choices, gap filling, column matching, true – false), based on the course teacher’s choices.
In case of multiple choices or true-false, you choose the answer you regard correct by clicking on the selection box next to it. In case of gap-filling, you type the answer you regard correct in the blank and in case of column matching questions you choose the correct answers from the lists of options. After answering the questions, click on “Submit” and wait for the results page.
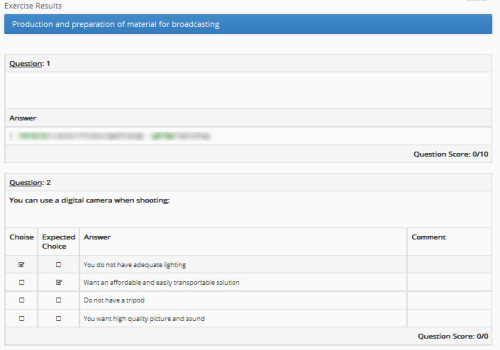
Your answers and total score appear on the results page. You can return to the course contents through the navigation bar on top of the page. It should be noted that you can solve a self-evaluation exercise as many times as you wish, since the course teacher is not informed about your results.
4.11 Multimedia
It is a module presenting multimedia educational material. There are two choices, video file or link to video that is stored in a VOD (Video on Demand) Server. These two choices are transparent for the students. Every video has a title and a short description.
So, if you want to access the multimedia educational material that the course teacher has added in the eCourse video module, you have to click on the title of the video you want to watch, and the system opens it with the associated video player (ex. Media player, QuickTime, Real player, jwplayer, etc).
4.12 Dropbox Module
Dropbox is a tool used to exchange messages and files. You can attach all the known file types in messages. More specifically, choose “New messages” in order to send a message.
In the form that appears type your message title and body. Then, choose the person(s) you will send it to from the users’ catalogue and click on “Send”. If you want to attach a file click on “Browse”.
The module involves two message lists. In the Received files appear all messages you have received from the students. In the Sent Files list appear the outcoming messages you have sent to the students. Moreover, the Other dropbox files section presents all the messages exchanged amongst the course students (including those you were not one of the recipients).
If the messages you have received or those you have sent becomes big enough, you can reduce it by deleting all or some of them. Note that messages will not be deleted from the database but only from your list.
4.13 Questionnaires
Questionnaire is a new module providing interaction between teachers and students. Course teacher create poll questionnaires about the course in order to have feedback from the students.
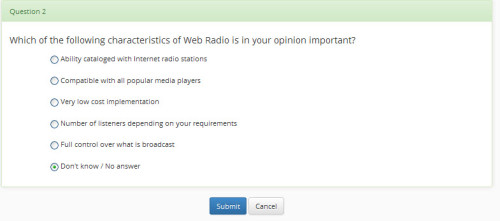
If you want to participate in a questionnaire click on the questionnaire’s title from the list, and all the questionnaire’s questions appear so that you can answer them.
You answer the questions by selecting the corresponding answer box and then you click on the “Next” button to proceed to the next questions. When you have answered all the available questions you press the submit button.
You cannot participate in the same poll again. For your own help there is a “You have previously participated” sign in all the questionnaires that you have already answer.
4.14 Teleconferencing
The subsystem “Chat” which provides messaging to chat format. To start a conversation simply enter the desired text and press the send button
4.15 Learning Path
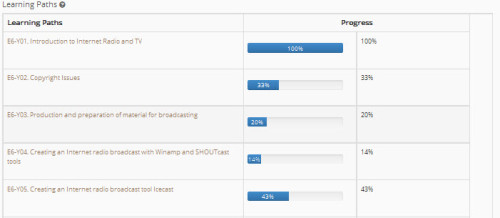
The Learning Path module incorporates into the Open eClass the SCORM prototype technology (Sharable Content Object Reference Model). SCORM is a standard for web-based Learning. It defines how the individual instruction elements are combined and sets conditions to the platform for using the content. This module offers the opportunity to the course teacher to create a sequence of steps (learning path) as learning activities, which should be followed by the students. Learning paths contain the course material (course documents, self-evaluation exercises, Internet useful links, course description etc.) or SCORM type object, as a specific learning action sequence of an eCourse.
Through this module, the student can be navigated in the available educational material and follows the steps as set by the teacher, in a specific order. Also provides platform the ability to watch learning progress, time and evaluation of the student in the several learning path steps.
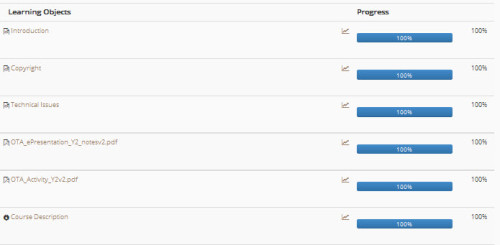
Learning path consists of units (at least one). The units are independent learning objects. In the current Open eClass platform, these tools may belong to one of the following five categories:
- Documents: Documents (any type of file) available in the course “Documents” area.
- Exercises: Self-evaluation exercises which are available on the course “Exercises” tool.
- Links: Useful links available through the course “links” tool.
- Course Description: The description that is available through the “Course Description” tool (description, course content, educational activities, books, etc).
- SCROM type content: These units are the result of inserting course packages that are compatible to the SCORM standard. Their contents depend on what has been included in them by the creator, which is documents, exercises, links, text and anything else that is approachable according to the SCROM definition, so that the platform can use it appropriately.
In order to start a learning path, you need to click the learning path title from the list. At first, each learning path progress and course progress will have a proportion of 0%. After all learning paths of a course have been completed; its progress will be at 100%.
There are some useful information and options:
- If you click on the arrows LEFT RIGHT you can move on to the next learning path unit or return to the previous one.
- If you click on the EPISTROFI sign, you can return to the learning paths list and not complete the learning path at that particular moment.
- If you have successfully completed the unit, there is a check next to the unit name.
- Also when a learning path unit is completed, progress can be seen on the corresponding bar, while its indication is 100% when all of them have been completed.
4.16 Wiki Module
The Wiki module is a collaboration course tool that allows registered users (teachers and students) to create and edit web page content. More specifically Wiki supports hyperlinks and has simple text syntax for creating new pages and cross links between internal pages on the fly.
In order to participate in a course Wiki, click on the “Wiki title” link from the course wiki list. Then click on “edit this page” and make any changes you want. To get the list of the last modified pages click on the link “Page history”. Please note that you can create easily cross links between internal pages by marking the linked text and clicking the button link or by placing the marked text between square brackets (ex. the [solution] of this problem is…). The word solution is a link.
4.17 Glossary
Glossary module displays terms and definitions for various keywords in the course. All these terms are entered to the course glossary by the teacher in charge and are presented to students in an alphabetical order.
Also glossary supports the autolinking feature (enabled by the teacher in charge), which will highlight any word in the course which is located in the glossary. The terms definitions are displayed by hovering the mouse over the highlighted term.
4.18 eBook module
EBook is a course module presenting electronic books in HTML format accessible via a simple web browser. More specifically electronic books are inserted into the course by the teacher in charge and are presented to the students in a full screen view.
Also the ebook module has embedded navigation tools (buttons, drop down lists) so that students can easily browse ebook contents.
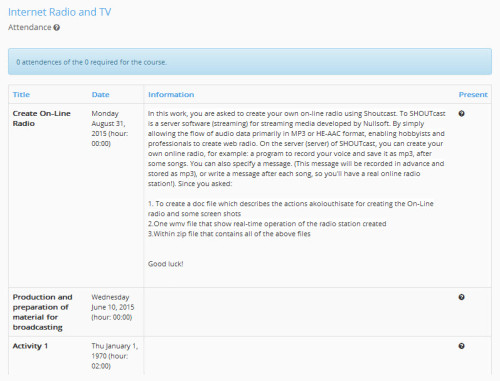
4.19 Attendance
The attendance subsystem allows the creation of “electronic attendance” for a particular course. Specifically:
- creates mandatory activities in a lesson
- inform the teacher for students who have exceeded the maximum absences in a course
- record attendance at activities of the course (with automatically or manually)
The learner selecting attendance subsystem has the ability to be informed about the presence of the various activities of attendance and compulsory attendance in class
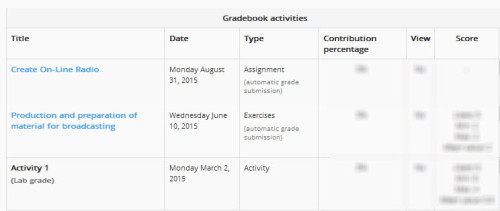
4.20 Gradebook
The subsystem “Gradebook” allows the creation of “Electronic Gradebook” in class. Specifically through the score is determined:
- 1. the final score and update students about their grades in a course
- 2. graduation students both in activities of the course (with automatically or manually) and in activities outside the course (eg, written tests)
- 3. Updating a student for grades having succeeded in all activities of a course
The student selecting the subsystem “Gradebook” has the ability to inquire into the rankings at: Various activities of the course, assignments, exercises, written tests, oral tests
4.21 Blogs
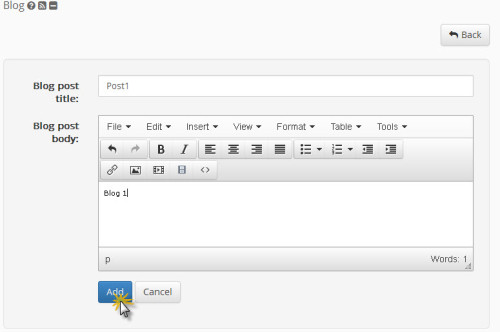
Users are entitled to pension suspension, can publish a blog post on a course using a rich text editor
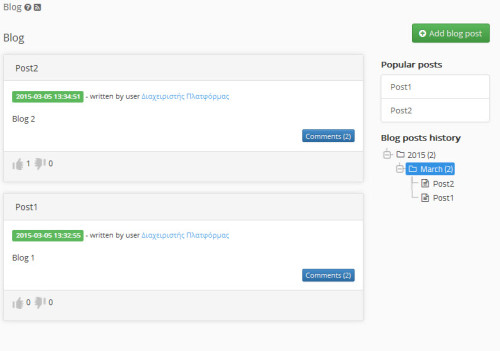
The posts appear truncated in chronological order from newest to oldest. Clicking the title of a suspension, the user can be transferred to the full suspension viewing page. To the right there is the list of the most popular posts and chronological tree with a history of posts
Blog posts management capability is the professor and the author of each post (if not identical). Specifically, it is possible to delete, and modify a post.
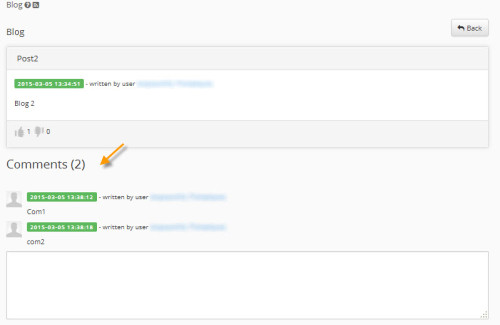
Down each post is a link to the tool commentary (if the teacher has enabled the blog each course) accompanied by the number of comments submitted in parentheses. Clicking on the link displayed comments and the comment submission form
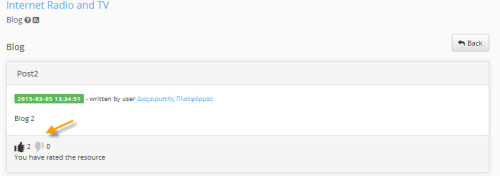
Finally, since the evaluation of the suspensions is enabled for the blog of the course, under the suspension occurs and evaluation widget:
4.22 My Messages
The subsystem “My Messages” provides the learner with the following features:
- Send private messages to specific users
- Sending messages to registered users of a course
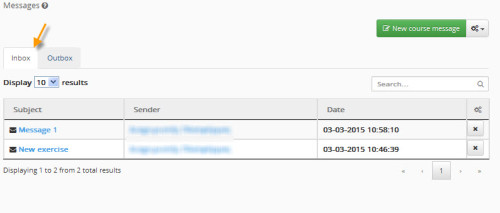
Choosing the function “New private message” you are offered to create a new personal message to a specific username at the base of which he places on the platform. Fill in the title of the message, the main message and the user-recipient of the message and click send.
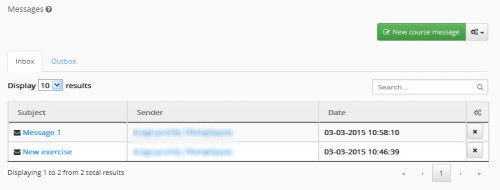
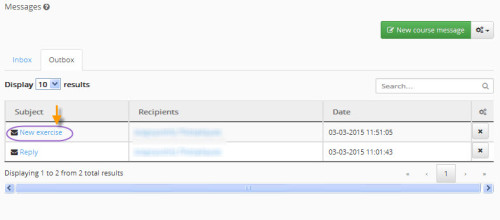
The result of the mission of this message appears in outgoing messages
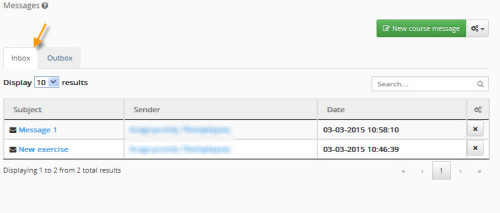
Replies and any other messages appear in the category of “incoming messages” of the subsystem.
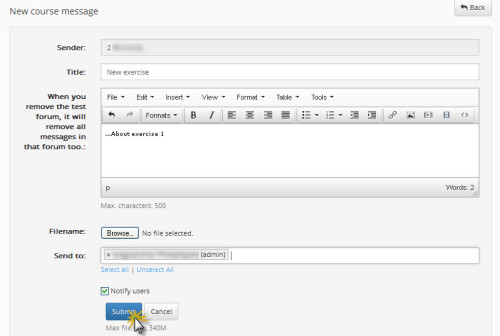
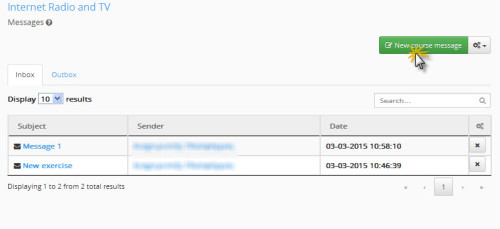
To send messages to registered users of the course we choose the option “New message Course”
Select the course you will be sending the message, the title of the message, the message text, the file to be sent (if desired), and the recipients of this message and click “Send”
4.23 My Notes
The subsystem “Notes” provides the learner with the following features:
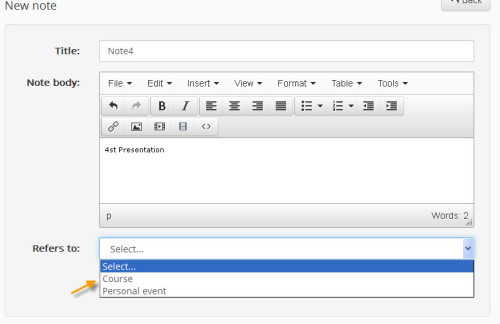
- Create lesson notes
- Create notes related to personal events
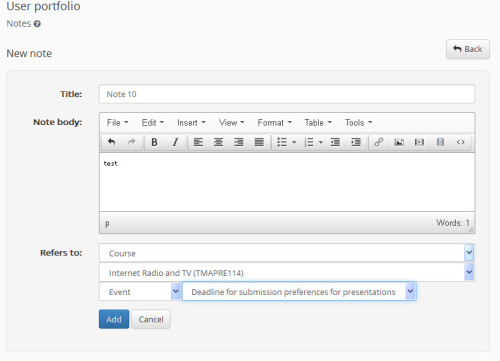
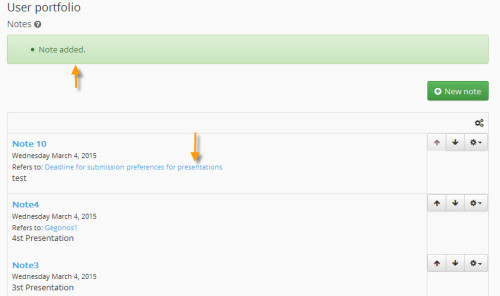
Choosing the function “Notes on the lesson” fill the title, note, the title of the course through a list of courses offered, what concerns this note (eg. Exercise, work, event) and click “Add” button
The result is visible to the user after the above steps shown below
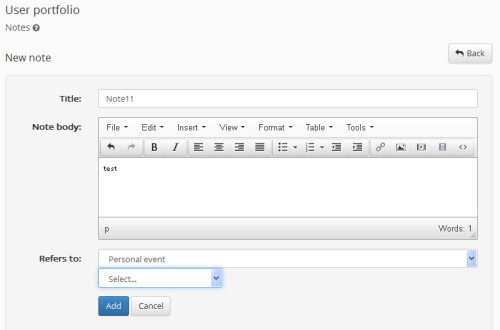
Choosing the function “Notes on personal event” fill the title, note, and select the staff which is the subsystem “My calendar” and click “Add” button
4.24 Teleconference-bbb
The subsystem “Teleconference” provides the learner with the following features:
- Ability to monitor and participate in presentations of the course instructor.
- Chat (Chat) with other students of the course or a private conversation with the trainer.
For your participation in a scheduled by teleconference trainer select tools from the subsystem “Conference Call” and then click “Connect” to connect to the scheduled conference call
5. Platform’s Support
The Open eClass is distributed for free as open-source software. Each platform installation is supported by the local administrators who are responsible for the platform’s operation, as well as the service of registered users’ (teachers, students) requests.
