Course Users
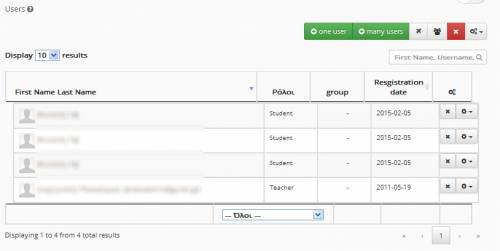
This module gives you the opportunity to administer the users who are registered to your course.
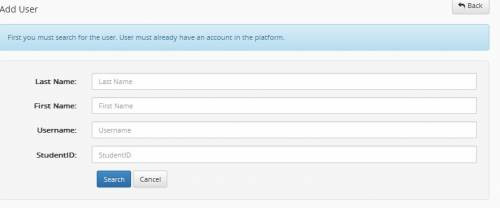
In order to add a user to your course, select the “Add a user” link, fill in one of the rising fields (Surname, Name, Username) and click on the “Search” button.
If the user has a platform account you will view their information and then click on the “Register User to the Course” link to fulfill the procedure.
Note: It is stressed that in order to add a student user to a course it is necessary for the user to have already created a platform account.
If you want to add many users to your course, click on “Add more users”. You will be asked a document with usernames. This document has to be a simple word format one, with usernames listed line by line. In this case users need to have a platform account as well. If you click on “Browse” and select the document, click on “Add” to enter the users. You will view messages related to the success or not of the process on the screen.
Adding Guest-Users
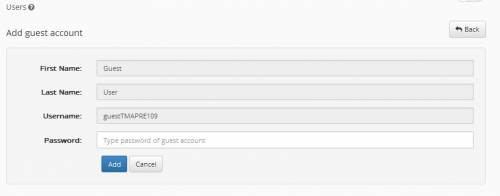
Click on “Add Guest-User” to activate a Guest account to your course. Enter a password for the user. Note their names are something like (e.g. guest TEST156) and click on the “Add” button.
If you have already activated the guest-user account, you can click on the “Add guest-user” link if you want to change their password and click on “Modification” to end the process. Just as happens during the activation process, if everything is done properly, you will be sent the appropriate system message.
Note: The guest-user has access to all course modules, like students do. The difference is that guests can watch but cannot actively participate in course modules. They are, for example, not allowed to email assignments or participate in chats and forums. Finally, they do not have the ability to change their profile information. For that reason, as soon as you activate the guest-user, you can inform all users you wish to have access to the course with the guest’s rights for the username (e.g. guest DI200) and password.
Deleting Users
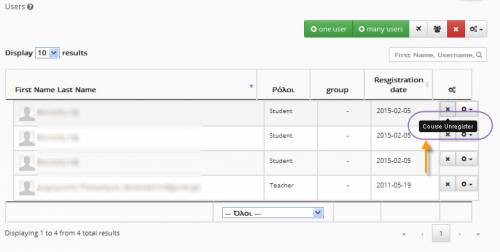
If you want to delete a user from the course users’ list, click on the delete icon that is in the same line with the username you intend to delete. The user will be deleted from the course (they will not be able to attend it), but their account will remain on the platform.
Note: If you click on the “Delete” sign, you only inactivate the specific user and you only need to follow the process described above in order to restore them. Remember that you cannot change users’ information, e.g. name or password. The information of each account is personal and can only be modified by users themselves.
Adding Admission License
You can attribute users the teacher identity by clicking on the “Add License” link from the “Teacher” column that is in line with the username you wish to attribute the teacher identity. Attribution of the id does not give users administration rights, but allows them to become a member of most of the “User Groups” (the student can become a member of one team only). This can be very useful when creating User Groups, especially in equalizing a User to a Teacher Group.
You can also attribute an administrator license to users by clicking on the “Add License” link on top of the column of “Administrator Rights” that is in line with the username of users to be attributed. This action gives users the same rights with the teacher in charge of the specific course (adding, modifying and deleting all content or even whole courses).
By clicking on “Excel Users Catalogue” you can locally download the complete course users’ catalogue in an Excel form.


