Familiarization with the BigBlueButton tool
The Teleconference platform (BBB) is a modern application and offers many features such as live video and audio transmission, online presentation, online voting, desktop sharing, chat discussion visible to all or private, etc. Each participant in the Teleconference assumes a role. The possible roles are:
- Administrator - Moderator
- Rresenter
- Member
The capabilities that each connected user will have in the Video Conference depend on their role. More specifically:
The Administrator-Moderator has the role of managing the session and can perform a number of functions such as: change session presenter, disable and enable user microphones as well as “lock” the current state of the microphones.
The Presenter has the possibility to present the material in the form of slides, but also to share part or all of the desktop of the personal computer to the other users of the session.
Member user can participate in the session with image - video (camera sharing), audio participation (microphone sharing), monitor - desktop presentation, join chat rooms. Also, the member user needs to keep his microphone in status mute and his camera sharing inactive when he does not need to address his interlocutors.
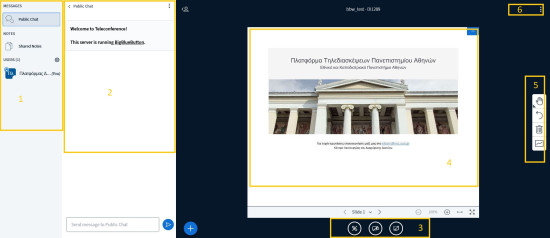
The working interface of the Video Conferencing platform as defined by the Default Display Layout is shown in the image below.
It consists of the individual regions:
- Area of connected users
- Discussion area
- Microphone/camera and sharing area
- Central presentation area
- Presentation tools-slides area
- Settings area
1. Area of connected users
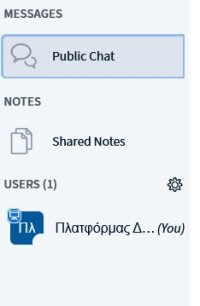
This area shows all the connected users of this conference call. Above each user icon, which is displayed in purple, the name of the user on the platform and the microphone status (the small round icon on the bottom right side of the icon) is displayed.
Users with a green microphone icon means that they have their microphone active, users with a red icon means that they have mute their microphone and users with a green icon and headphones means that they are in a state where they can only listen to the presentation. These three forms of the respective icons are illustrated in the figure below.
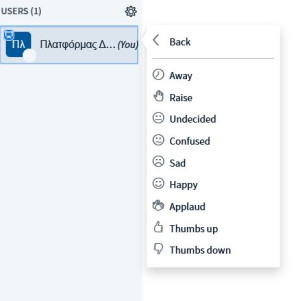
In the user area by clicking on your icon you can change the status (unavailable, hand up) you are in from a list of icons which correspond to a number of functions as shown in the image below.
2. Discussion area
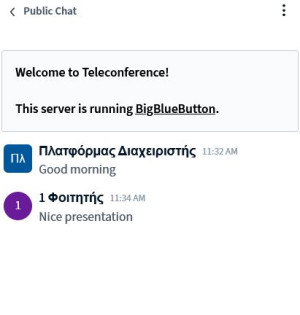
The discussion area can be used for communication between participants alongside the session being held. To send a new message to the discussion area, simply enter the text in the corresponding field (bottom of the screen) and click on the blue arrow icon to complete the message. Your message has just been sent and is now visible to all participants.A short message exchange is shown on the screen below
3.Microphone/camera and sharing area
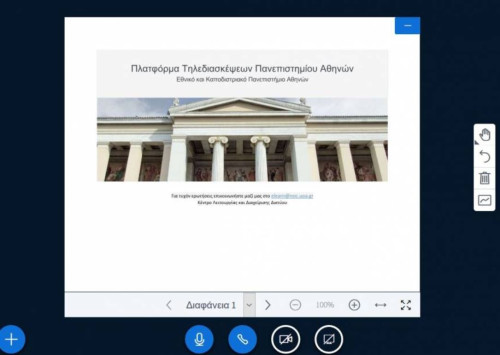
In this area you are given a number of options concerning your microphone, your camera and your desktop which can be configured via the respective controls (the buttons at the bottom of the screen below).
In the horizontal toolbar as they appear on the screen below we can find: the first microphone button from the left. This button when it is blue indicates that your microphone status is active and when it is white indicates that it is off (mute). The second button (headset) when it is blue indicates that you are connected to the session with audio. If everything is running smoothly with your audio it is not recommended to use this button. However, if you are having problems with your audio (you can't hear or they can't hear you) you can press this button and the initial audio diagnostic tests will be repeated with the aim of solving the specific problems.
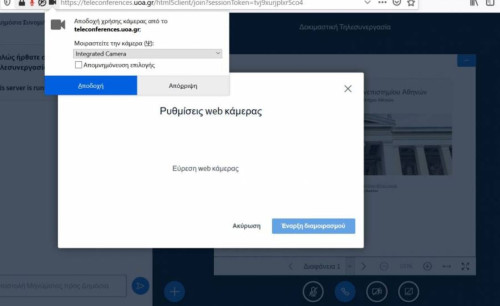
The third button is for sharing your camera. By clicking on it you will be asked to accept sharing your camera via the corresponding message in your browser as shown on the screen below. You simply need to select “Accept” and then “Start sharing”.
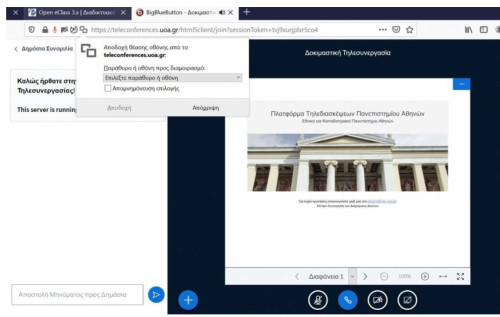
The fourth button is about sharing your screen. In this way the instructor of the course can share his/her computer screen or part of it with the participants to show for example a web page related to the presentation or an application related to the presentation. By clicking on this button you will be asked to accept the sharing and specify a window or screen to be shared as shown in the image below.
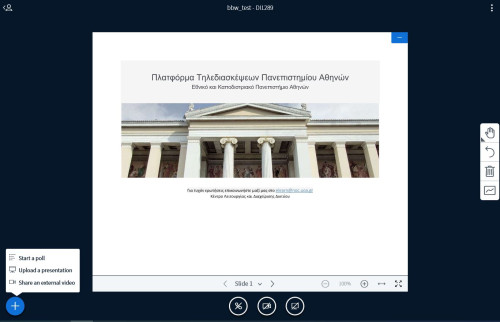
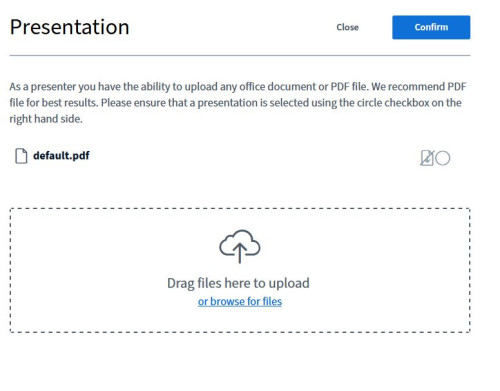
At this point we should stress a very important function which is located in this area. This is none other than the button with the cross and which contains the “Upload Presentation” action as shown in the image below. By clicking on this button and selecting “Upload Presentation”, the course instructor will see a new window asking to specify the location where the saved presentation is located.
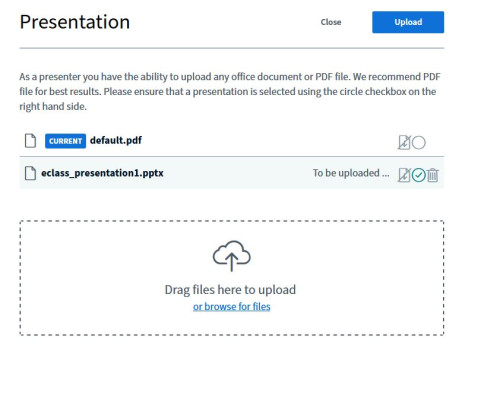
We select the “cloud arrow” and specify the location where the presentation archive is located on our disk. Here we should point out that BBB accepts various types of files (pdf, pptx, docx) but it is recommended that the presentation file be in pdf format due to the fact that the platform converts any other format to pdf when it uploads it. We then select the “Upload” button to complete the process.
During the upload, a presentation bar displays the progress of the presentation upload.
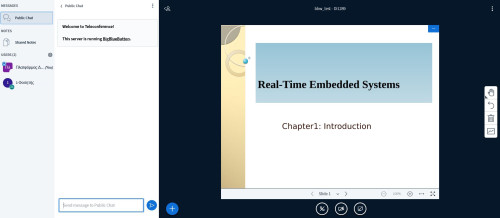
Finally having successfully uploaded our presentation we have the following image.
4. Central presentation area
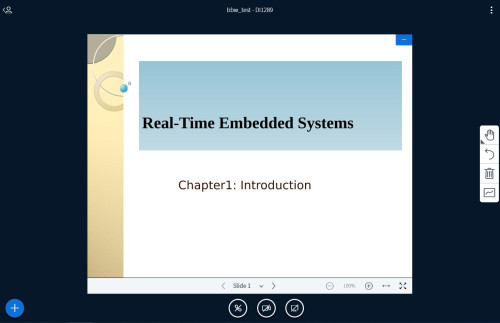
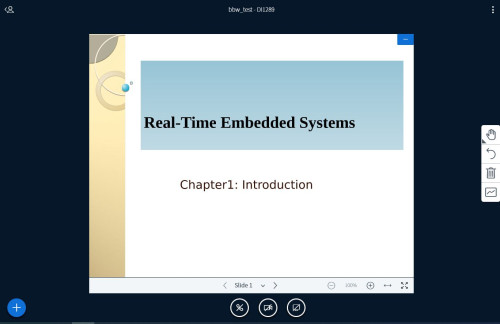
In this area the instructor of the course should have downloaded and read the presentation of the course as described in the previous step (area 3). A screen of the central presentation area with a downloaded presentation is shown in the following picture.
Now that you have downloaded your presentation a number of button-controls in this area are available as shown in the image below. Specifically the transition controls (< and >) from one slide to another, the (-) and (+) controls which relate to the focus (zoom) of the slide, and the multiple arrow button which allows you to go to full screen of the presentation.
If you want your presentation to look more prominent, all you have to do is select the full screen button. This helps remote users to get a better view of the presentation in question. To return from full screen to the previous state simply press the Esc key on your keyboard.
5.Presentation-slide tool area
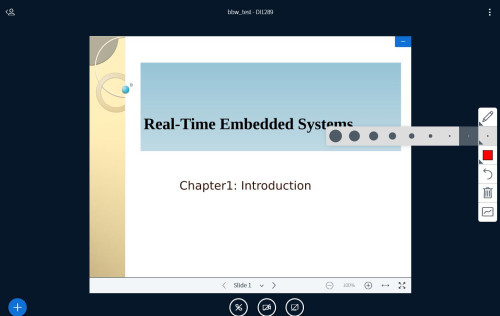
In this area and specifically in the right vertical column there is a toolbar which is related to the slides. We could say that this toolbar functions as the tools of an interactive whiteboard.In this toolbar we can see the text input button, a number of geometric shapes as well as the pencil tool.
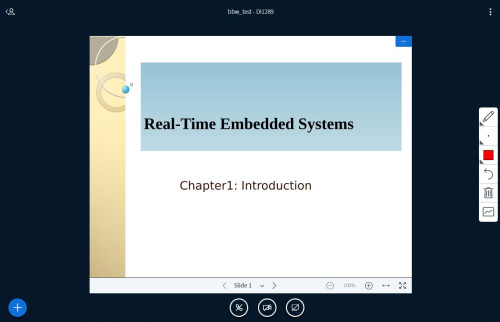
If we select the pencil tool then a number of additional settings are displayed which are specific to that tool such as its thickness and drawing colour.
We should also mention the buttons to undo a highlight, delete all highlights and the button to turn on and off the whiteboard.
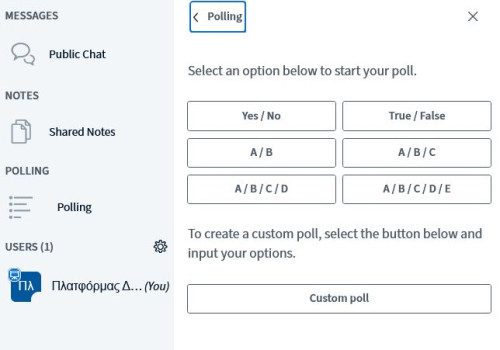
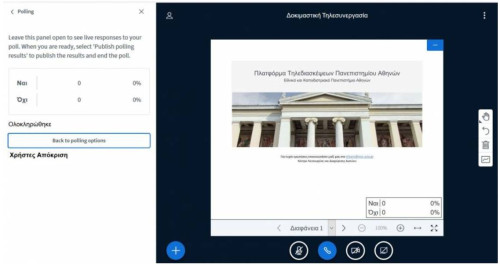
Start voting. As the instructor of the course you have the possibility to create a vote on a question within the course. In this way, you give learners the opportunity to decide on an issue that directly concerns them (e.g. the delivery date of a mandatory course assignment). To start a new vote you only have to press the blue round button with the cross on the left side of this screen. From the options displayed select “Start Poll” as shown in the screen below.
You can then choose one of the predefined voting formats available on the platform or create a new voting format of your own via the “Custom” option. In the first case, if you wish to create a new predefined voting format, you only have to select one of the available ones. You will first have to pose a question via the message sending to learners and then you will have to select a voting format which will be relevant to that question. For example you could ask trainees if they agree with the delivery date of a task and choose the yes/no format.
To publish the results of the voting, select “Publish polling results”. Automatically on the right-hand side of the specified area, the voting results will be displayed to all trainees.
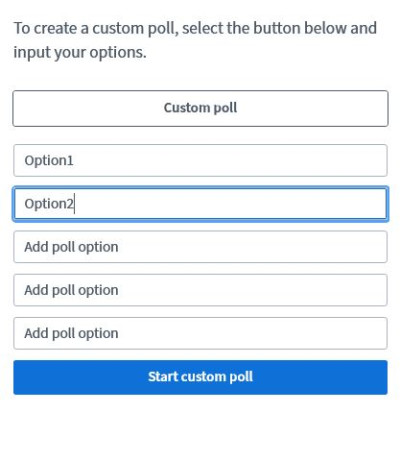
In order to create your own poll format first select “Custom poll”. Then specify your own poll responses e.g. Choice 1, Choice 2,… Choice 5. Finally select the “Start Custom Poll” button in order to start the poll you created.
6.Settings area
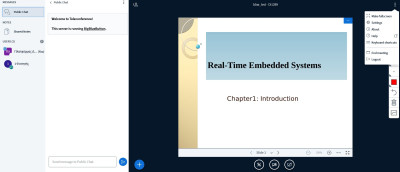
In this area a number of settings are available to the course instructor. Specifically actions such as switching the presentation to full screen, opening settings, help, keyboard shortcuts, ending the session, and logging out of the BBB platform.
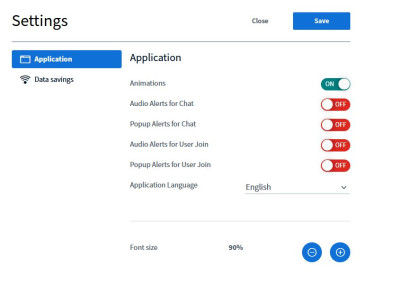
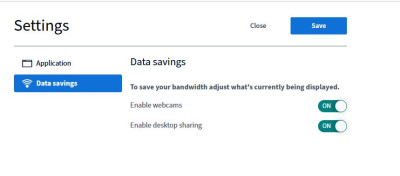
Here we should focus on the “Open Settings” option as shown in the image below. Specifically, the settings are divided into two categories, application settings and data settings. The application settings which include on-off controls through which you can disable features such as Animations, Audio and Popup notifications for chat, Audio and Popup notifications for user input, the language in which the application will be displayed, and font resizing.To save the changes you have made to these settings select the “Save” button.
In the data area, you can turn the camera on and off. You can also enable and disable screen sharing. To save the changes you have made to these settings, select the “Save” button.
